Configuration
The T1000 appliance has a built-in graphical user interface that provides configuration options for authorization, proxy settings, dashboard, upgrade, user management, exporting and importing accounts, replicator endpoint settings, certificate management, and other system tool modules. Customers can access this interface in a web browser.
The Web Management Interface is not fully usable while the database is going through internal verification. Depending on the hardware, this process can take between 10 and 60 minutes each time the appliance is restarted.
Web management
To access the management interface for the first time, open the following address in a web browser:
<http>://<appliance_url_or_ip>:10000
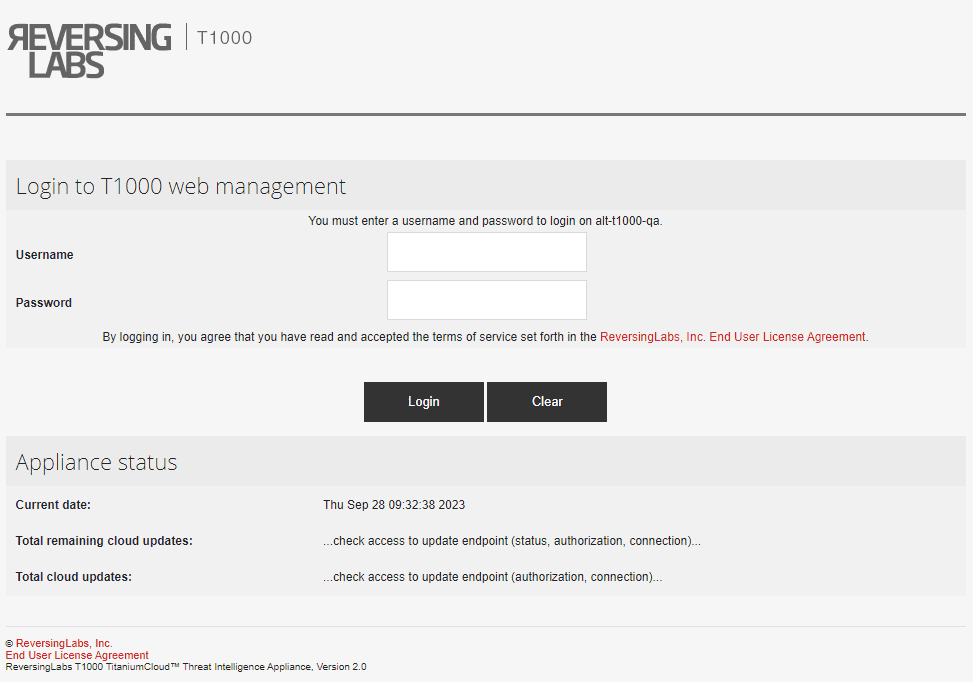
On the login page, use the provided username and password to log in. After the first login, it is necessary to provide a new password and log in with it.
When first started, the T1000 appliance contains no authorization data. This makes the appliance unable to connect to Spectra Intelligence, and unable to retrieve the latest updates. Furthermore, the fields for total remaining cloud updates, total cloud updates, and update status are blank.
After authorization, T1000 will download the latest database updates from
Spectra Intelligence. By default, feed updates will be retrieved from
https://data.reversinglabs.com/replicator/v1 on port 443. To change the
Replicator URL, see the section T1000 Replicator Endpoint Module.
When the appliance is authorized, the fields on the login page will contain information about the appliance status:
- Total remaining cloud updates - the number of available updates not yet downloaded
- Total cloud updates - total number of available updates for download
- Update status - current status of downloaded updates
To log out from the appliance, select Logout from the upper right menu that displays the username.
Authorization
The T1000 appliance needs to be authorized to be able to update the local database.
Navigate to the main menu and select RL Appliance > Authorization to load the Authorization module.
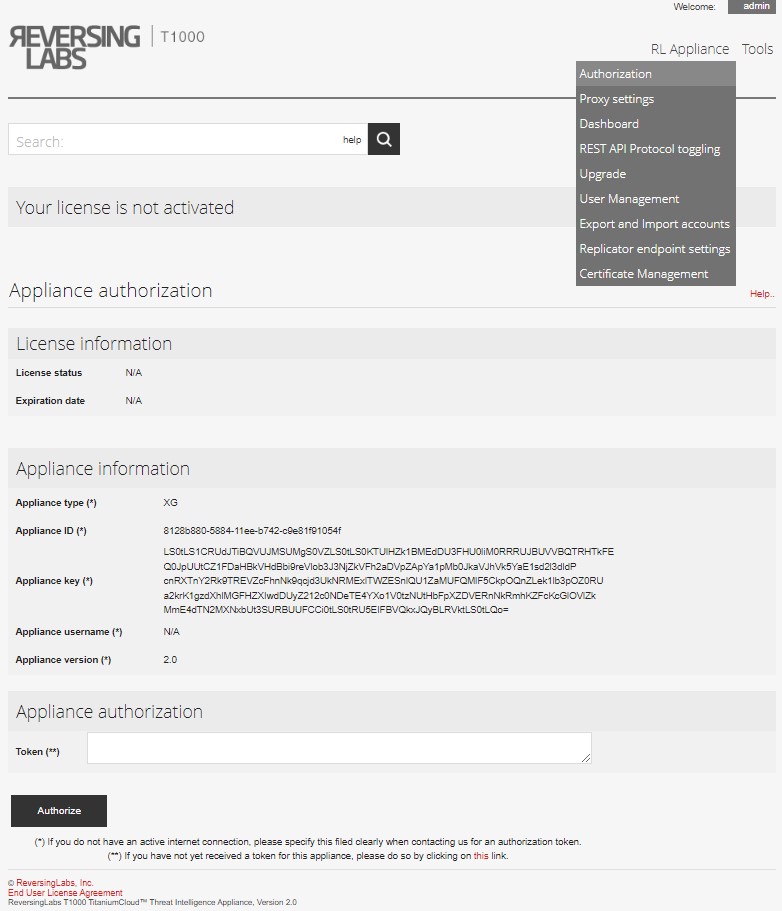
If an email client is configured on the system, use the link on the right side under the Authorize button.
If an email client is not configured, copy the content of the Appliance Type, Appliance ID, Appliance key, Appliance version, Appliance username and Expiration date fields and send it to support@reversinglabs.com. Note that in the unauthorized appliance state, the Appliance Username and Expiration Date fields will display as "N/A".

Copy the received token into the Token field and Authorize the appliance.
After successful authorization, restart the VM.
When the appliance is successfully authorized, create a user to access the REST API.
Licensing
The T1000 appliance uses licenses with expiration dates.
In the initial phase, when the license is in an inactive state, certain modules (excluding the Authorization module), configurations and API access are restricted. In this state all displayed information will indicate "Your license is not activated."
Upon successful authorization, all modules become accessible, and information regarding the license status and expiry date becomes visible within the Authorization module.
Managing users
This module manages users that are connecting to the REST API of the appliance. Navigate to the main menu and select RL Appliance > User Management.
The username can contain only alphanumeric characters, and it cannot be admin.
Usernames always have the u/ prefix and must be used with that prefix.
Usernames and passwords are case-sensitive.

When a user has been successfully added, the "User info" section will display the new username and its generated 8-character-long password.
Users can be disabled, or deleted.
Passwords cannot be manually changed, but a new password can be generated using the Reset password button.
Importing and exporting accounts
The exporting and importing accounts functionality is used to export or import an existing account database to or from another ReversingLabs T1000 appliance. Navigate to the main menu and select RL Appliance > Export and import accounts to access this functionality.
When importing accounts with the same name (e.g., u/test), the existing
account(s) will be overwritten.
The RL Appliance menu contains additional configuration options.
- You can set a proxy (HTTP/HTTPS).
- You can start/stop the appliance on the Dashboard page.
- You can switch between HTTP and HTTPS for API access on the REST API Protocol toggling page.
- Upgrading is done by uploading an upgrade file on the Upgrade page. The machine needs to
be rebooted after upgrade.
warning
Restart the appliance only if the upgrade was successful.
- The replicator endpoint page allows changing the URL for the replicator service. Custom settings here may break the appliance, so please contact support if you need a custom URL for the replicator service. Changing this setting requires an appliance restart.
- The Certificate Management page allows replacing the SSL certificate and key for the web server. By default, the machine uses a self-signed certificate from ReversingLabs.
Help
The built-in ReversingLabs Appliance Help documentation contains basic information about the modules and the REST API provided by the T1000 appliance.
To access this documentation, click the help link inside the search box.
System configuration
Network interfaces
Tools > Network Configuration > Network Interfaces
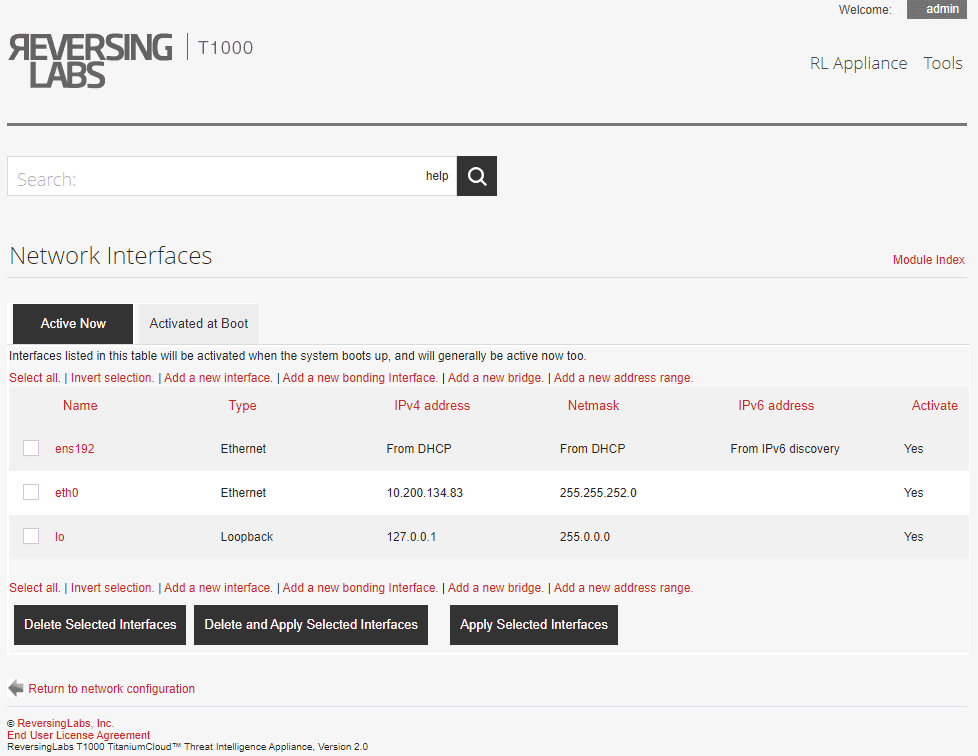
At the top, under Interfaces Active Now are the interfaces that are currently enabled and have an IP address assigned. All loopback, Ethernet and PPP interfaces will be shown, although not all will be editable.
At the bottom, under Interfaces Activated at Boot Time are the interfaces that have been configured to be activated at boot.
The two lists will not necessarily be the same, as some interface types (such as PPP) are not activated at boot time, and do not appear in the second list.
How to change the IP address
- If the interface appears under both Interfaces Active Now and Interfaces Activated at Boot Time (as most of the editable ones do), click its name in the lower list. This will open a dialog for editing its settings.
- To assign a different address, enter it into the IP Address field. To enable dynamic IP address assignment by a DHCP server, select the From DHCP option.
- If necessary, change the Netmask field. If the Netmask or the IP address fields are changed, the Broadcast address based on the new netmask and IP also needs to be set.
- When editing an active interface, the MTU and Hardware address fields will be available. The MTU field should be edited only by experienced users because it can seriously impact network performance or completely cut the system off from the rest of the network. The hardware address should only be changed if the network card needs a different Ethernet address, which is rarely necessary.
- If editing a boot-time interface, make sure the Activate at boot? option is set to Yes so that the interface is brought up when the system starts. If editing an active interface, make sure the Status option is set to Up so that it can be used immediately.
- When done editing a boot-time interface, click the Save & Apply button to
save changes for use at boot time, and to make them immediately active. When
editing an active interface, just click
Saveto apply changes.
How to configure routing
Tools > Network Configuration > Routing & Gateways
Any system attached to a large network needs to know the address of the default gateway. In some cases, the system itself may be a gateway as well - perhaps forwarding data between a local area network and a broadband connection. In this case, it must be configured to forward incoming packets that are destined for some other address.
In some cases, the traffic destined for certain networks may have to be sent through another router instead of the default gateway. If more than one IP networks share the same LAN, the traffic for any of those networks must be sent using the correct interface.
If either of these are the case on your network, static or local routes need to be configured so that the system knows where to send packets for certain destinations.
To change the default gateway used by your system or enable packet forwarding, follow these steps.
- Enter the IP address of the default gateway into the Default router field.
- Enter the name of the network interface that must be used to reach the default router into the Default route device field. On some Linux distributions this field is optional, meaning that the system will set it automatically. On others, there is a Gateway field next to the Default router field.
- To enable routing, set the Act as router? option to Yes.
- On RedHat, Mandrake, MSC and Turbo Linux, static routes can be set up using
the Static routes table. Each static route must be in a new row
containing the following information:
- In the Interface column, enter the interface that will be used to reach the router, such as eth0
- In the Network column, enter the address of the remote network, such as 192.168.5.0
- In the Netmask column, enter the network's netmask, such as 255.255.255.0
- In the Gateway column, enter the IP address of a router that knows how to forward data to the network, such as 192.168.4.1
- On distributions mentioned in step 4, routing to additional IP networks can
be set using the Local routes table. Each route needs to be in a new row
containing the following information:
- In the Interface column, enter the name of the interface that the LAN is connected to, such as eth1
- In the Network column, enter the address of the additional IP network, such as 192.168.3.0
- Click the Save button when done modifying the settings. Any changes will not be activated immediately - instead, they will only take effect on the next boot.
If the system's primary network connection is via PPP dialup, then the default gateway will be assigned automatically when connecting, and removed when disconnected. Therefore it is not necessary to set it up with this dialog.
How to change the hostname or DNS settings
Tools > Network Configuration > DNS Client
Enter the new hostname (composed of letters, numbers, underscores and dots) into the Hostname field.
Click the Save button to immediately apply the change. The browser will redirect to the main Network Configuration module page.
If there’s a local DNS server running on the network, don't forget to update the entry for the reconfigured system there as well.
To change the system's DNS settings, follow these steps:
- Click the DNS Client icon on the main Network Configuration module page to open the configuration dialog.
- Enter the addresses of up to three servers into the DNS servers field. If the first is not available, the system will try the second, or the third. Most networks will have at least a primary and secondary DNS server to increase reliability in case one fails.
- The Resolution order field can be used to control where the system will
look when resolving hostnames and IP addresses. Generally, the defaults are
reasonable, with the
/etc/hostsfile listed first and DNS later. However, if NIS is used for hostname resolution, it must be selected somewhere in the order. - In the Search domains field, enter any domain names to automatically
append to resolve hostnames. For example, if foo.com was on the list and
the user ran the command
telnet server1, then the IP address for server1.foo.com would be looked up. - When done modifying the settings, click the
Savebutton. Any changes will take effect immediately in all programs running on the system.
If the system's only network connection is via dial-up, the DNS servers may be assigned automatically by the ISP depending on the PPP configuration.
Editing host addresses
On a small network with only a few systems, there is an option of not running a DNS server at all, but instead keeping the addresses of every system in the hosts file on each system.
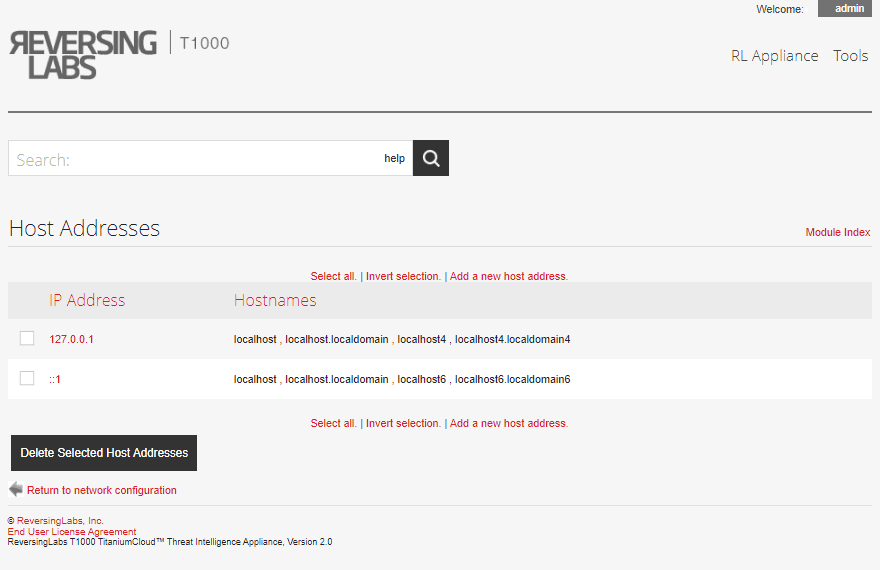
To view the addresses on the current system, click the Host Addresses icon on
the main Network Configuration module page. There will always be an entry for
localhost, and probably one for the local system's hostname as well.
If the system's IP address or hostname have been changed, the host addresses list will probably not reflect the change, which could cause problems.
To change a host address, follow these steps:
- Click a host IP address in the list, which opens the configuration dialog.
- Enter the new address into the IP Address field.
- Enter any hostnames into the Hostnames field. It is always a good idea to
enter both the short and long forms of any hostname, such as
server1.foo.comandserver1so that both can be used. - Click the Save button. If there are no errors in the dialog, the browser will return to the list of hosts and addresses.
Extra host addresses can be added by clicking the Add a new host address link above or below the list.
There are no restrictions on the same hostname being associated with two different IP addresses, or the same IP address appearing twice in the list.
Running processes
This module can be used to view, kill, re-prioritize, and run processes on the system. When opened for the first time from the System category, the main page will display a tree of processes.
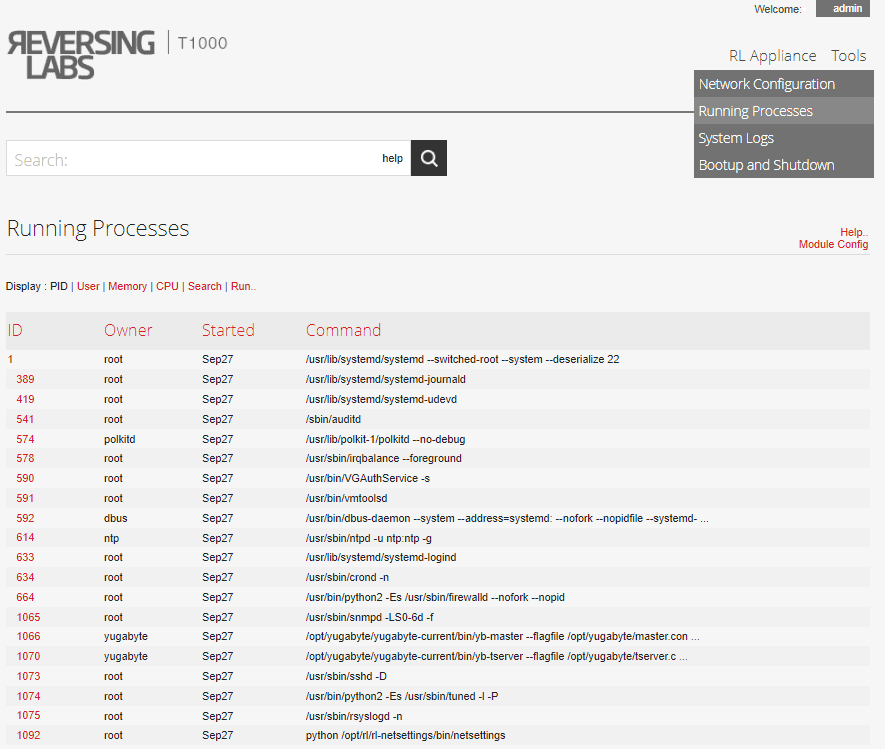
Starting a Process
The module can also be used to run simple commands, either in the foreground so that their output is displayed, or in the background as daemons. This can be useful for running a command without having to login via telnet or SSH (or if a firewall is preventing a telnet or SSH login).
The following steps describe the procedure for starting a process.
- On the main page of the module, click the Run link next to the display mode options. This redirects to the dialog for starting a new process.
- Enter the command into the Command to run field.
- If the command is something that will take a long time to run, the Run mode option can be set to Run in background to automatically put the process in the background. To see the output from the command, leave the option set to Wait until complete.
- Enter any input to be fed to the command into the Input to command field.
- Click the Run button to execute the command. If the Wait until complete option was selected, any output from the command will be displayed.
Viewing, stopping, or prioritizing a process
To see the full details of any running process, click its Process ID column entry in any of the sections on the main page. This opens the process information page.

The process can be stopped with a TERM signal by clicking the
Terminate Process button. Because this can be ignored by some commands, the
Kill Process button can be used to send a KILL signal if the termination
fails. Unless the process hangs inside a kernel system call, killing it is
guaranteed to succeed.
Other signals can be sent by selecting the type of signal next to the Send Signal button before clicking it.
Some of the more useful signals include:
HUP: for many server processes, this signal will cause them to re-read their configuration filesSTOP: suspends the process until a CONT signal is receivedCONT: resumes a process that has been suspended by a STOP signal
The information page can also be used to change the nice level of a running
process, giving it a higher or lower priority.
To change the priority of a process, select a new level from the Nice level list, and then click the Change button. Lower levels mean higher priorities, so a process with a nice level of 10 will get less CPU time than the one with level 5.
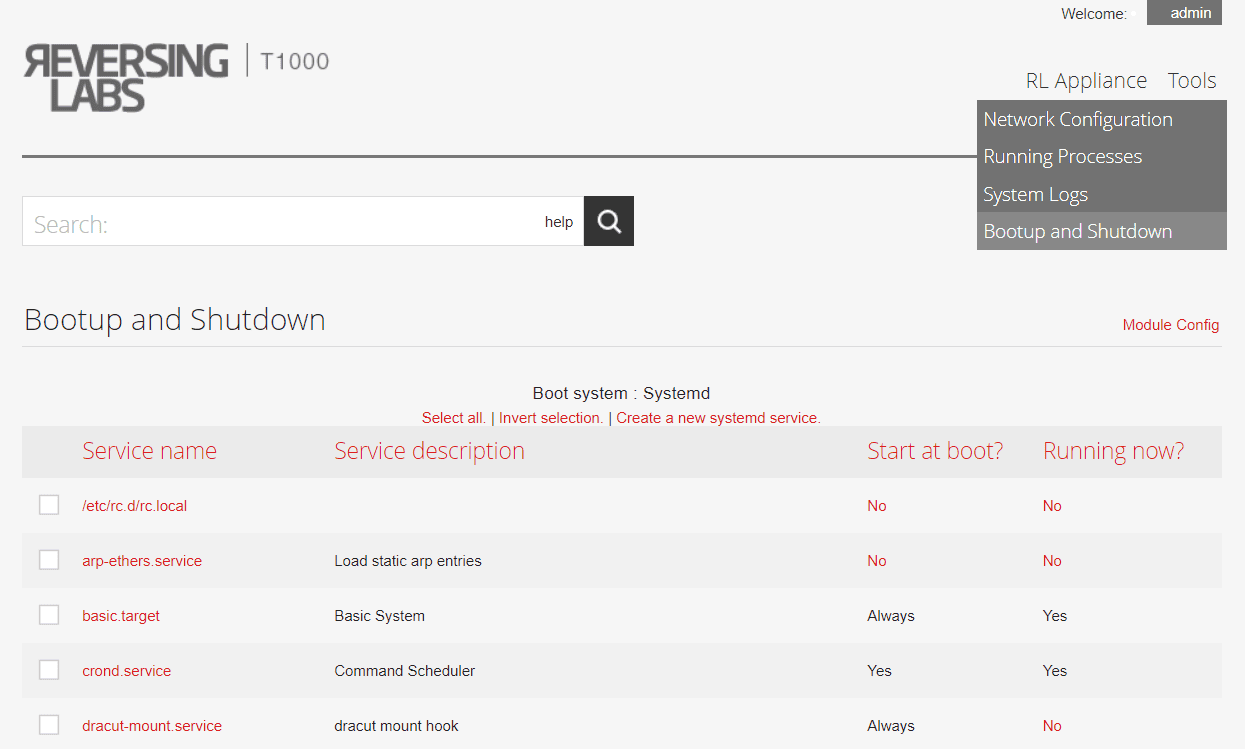
Bootup and shutdown
This module allows creating and editing scripts that run at bootup and shutdown time.
The main page of the module displays a list of all available actions (whether or not they are started at boot), and a short description for each.
To avoid the risk of losing data on the local hard drives, the system should always be rebooted or shut down with the appropriate commands, instead of turning off the power or pressing the reset button.
If the system was improperly shut down, it will perform a lengthy file system
check with fsck at next boot time if using a non-journaling filesystem.
To reboot the system, follow these steps:
- At the bottom of the Bootup and Shutdown module page, click the Reboot System button. This opens a new page prompting for reboot confirmation.
- Click the Reboot System button on the confirmation page. The shutdown process starts immediately, and the current console session is automatically logged out. After all the shutdown scripts have been executed, the system will boot up again.
The procedure for shutting down the system is nearly identical, and triggered using the Shutdown System button at the bottom of the page.