Self-Service Registration
This guide describes how to set up self-service registration for Spectra Analyze using Okta as the identity provider. It can be set up with SAML or OIDC integration.
Setting up Okta with Spectra Analyze
In the Okta Administration interface, navigate to Applications > Applications and click Create App Integration. Set up either OIDC or SAML integration.
SAML
- Enter the required username and password attribute statements.
Group attributes are only necessary if the groups functionality is intended to be used.
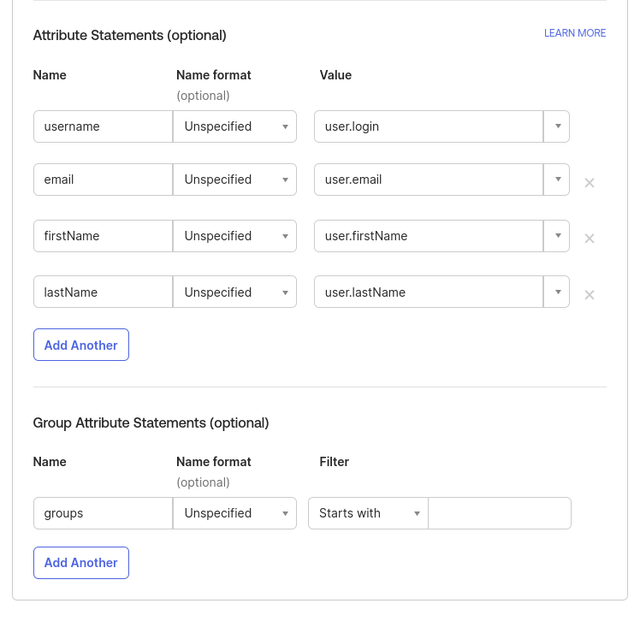
- When the integration is configured, navigate to the Assignments tab and assign at least one group to the application.
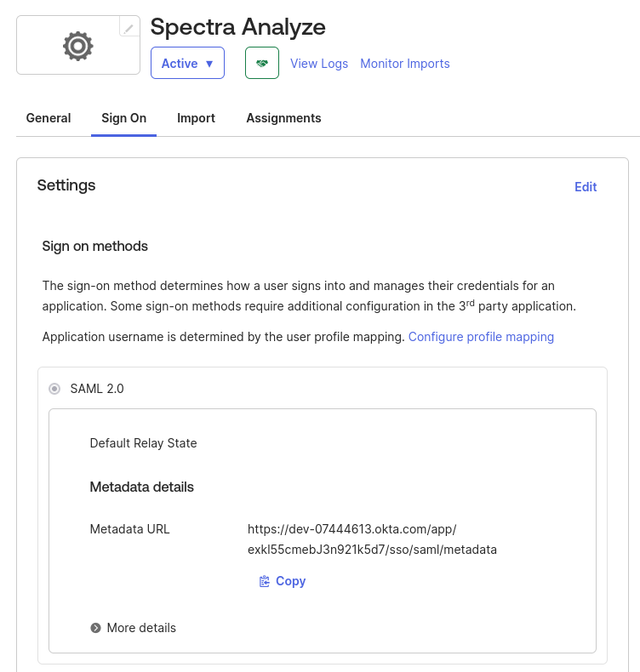
- Navigate to the Sign On tab and download the metadata.
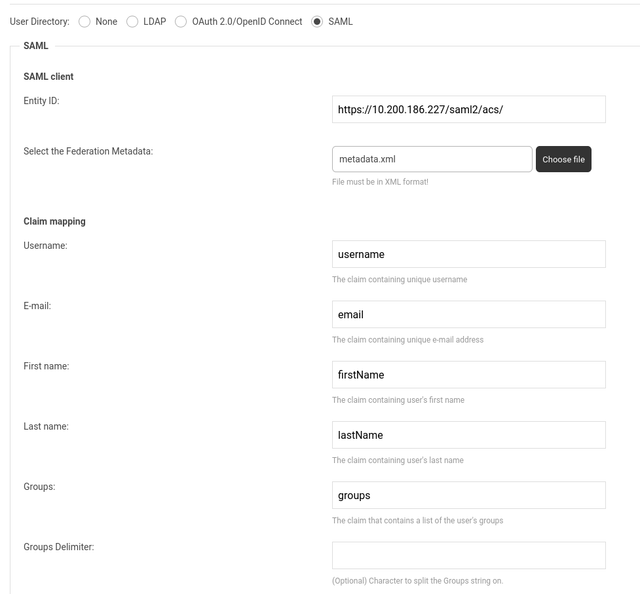
- Set up the SAML configuration in Spectra Analyze with matching claims and upload the metadata.
Make sure to select the Allow unsolicited responses from IdP checkbox.
Enabling Sign Up
- In Security > Profile Enrollment, create a new Profile Enrollment Policy.
- Set the Self-service registration to
Allowed, and select the Email verification checkbox.
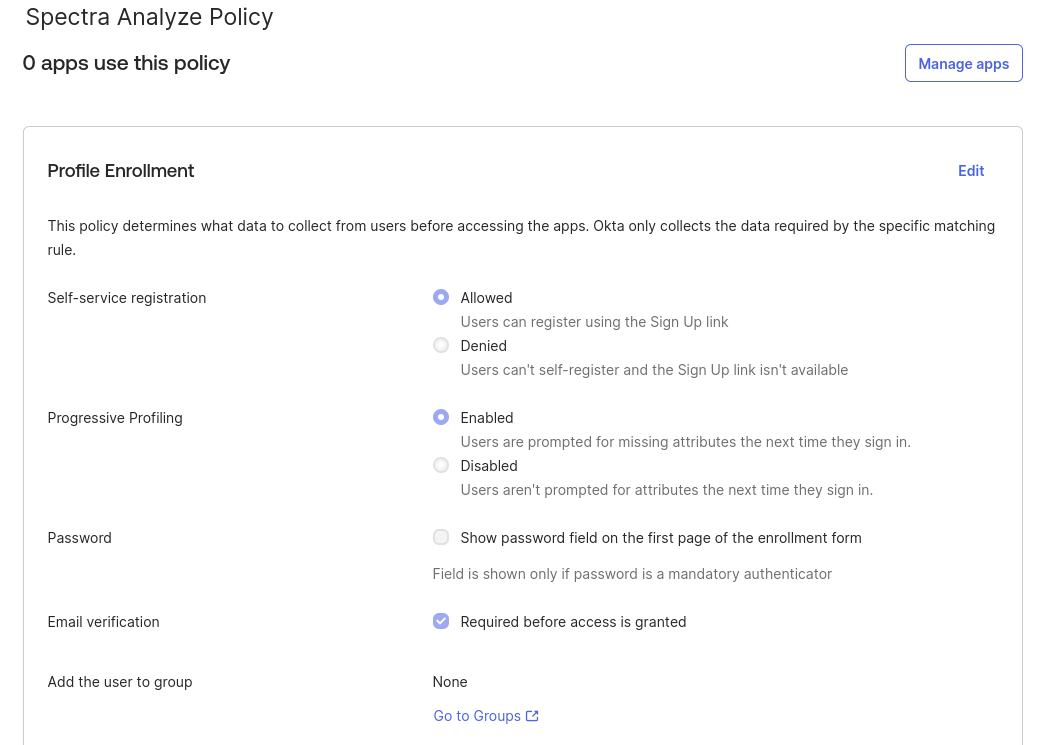
- Navigate to Manage apps and add your application to the created policy.
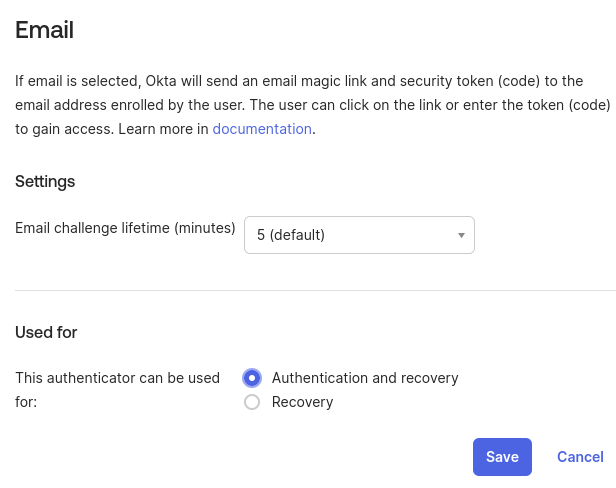
- In Security > Authenticators, edit the Email authenticator, and enable it to be used for both authentication and recovery.
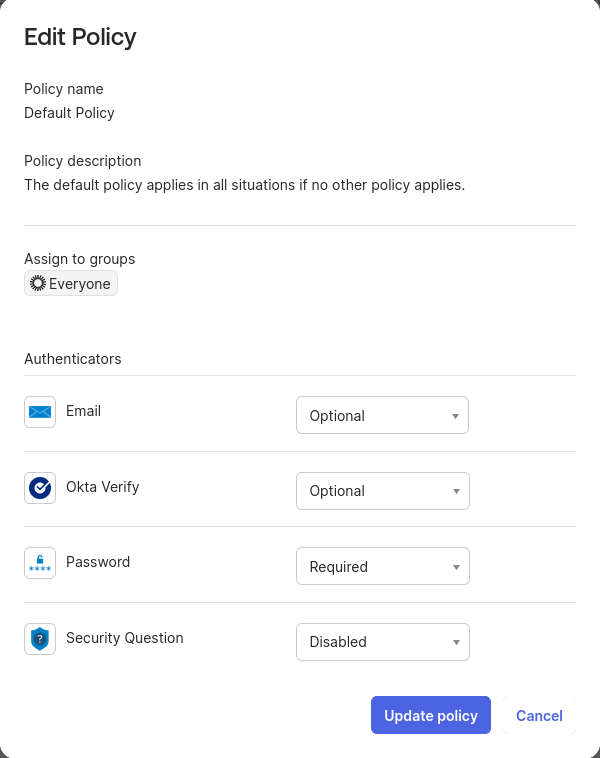
- In the Enrollment tab, add a new policy for the same group that was assigned to the application, and set the Email authenticator to at least
Optional.
- In Security > Authentication Policies, click Add a policy.
- Add your application to this policy, and edit the Catch-all Rule by setting it to deny access.
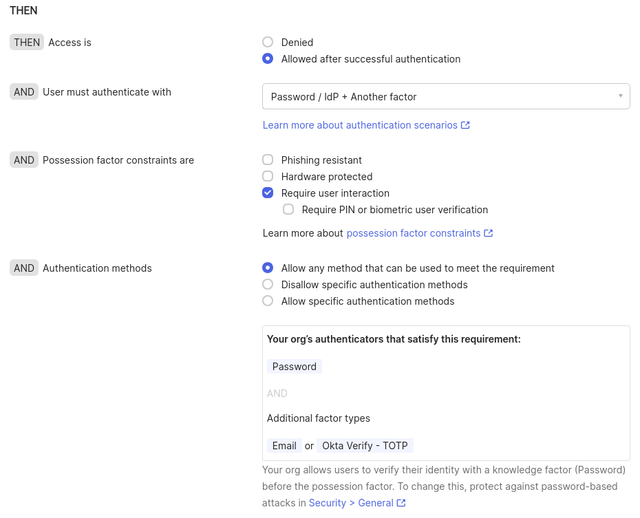
- Add a new rule, and configure it so that the access is allowed, and the user must authenticate using Password / IdP + another factor.
- For the Possession factor constraints, set
Require user interaction. - Set up the Authentication methods according to your requirements, and set it to allow at least password and email.
Frequency of password and other factors of authentication can be configured at the bottom.
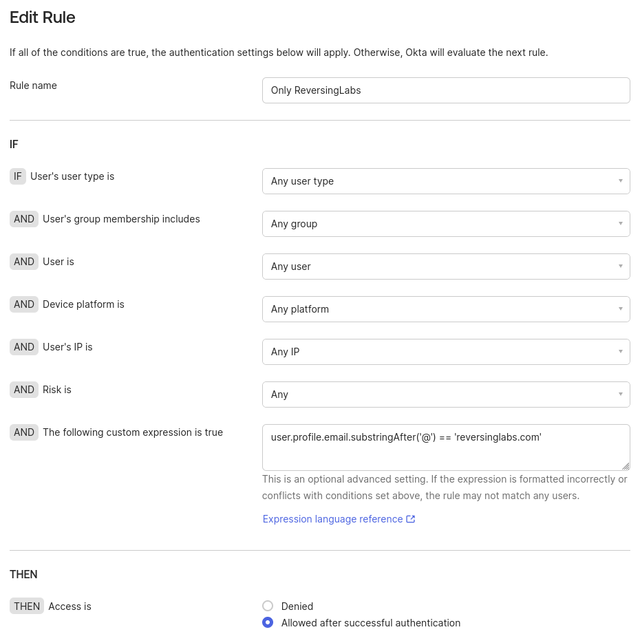
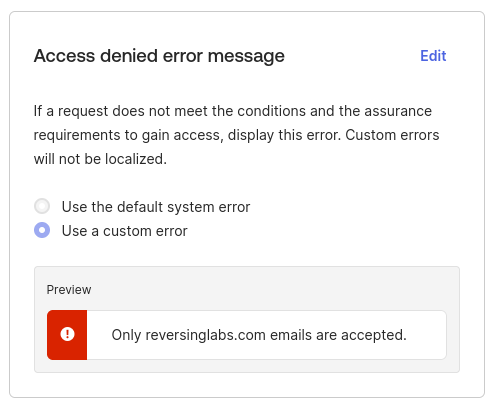
To add additional conditions, such as limiting the eligible emails for sign up to a certain domain, add a custom expression in the IF section, such as user.profile.email.substringAfter('@') == 'reversinglabs.com'.
Any failed attempts will create inactive user accounts in Okta's directory. An alternative involves inline hooks, making the web service require additional filtering capabilities. This approach should not result in inactive user accounts.
Customizing the Sign Up Screen
- In Customizations > Other, you can change the error message for failed sign-up attempts, and other error messages.
- In Customizations > Brands, you can configure the appearance of the screens, including the sign in screens and emails sent by Okta.
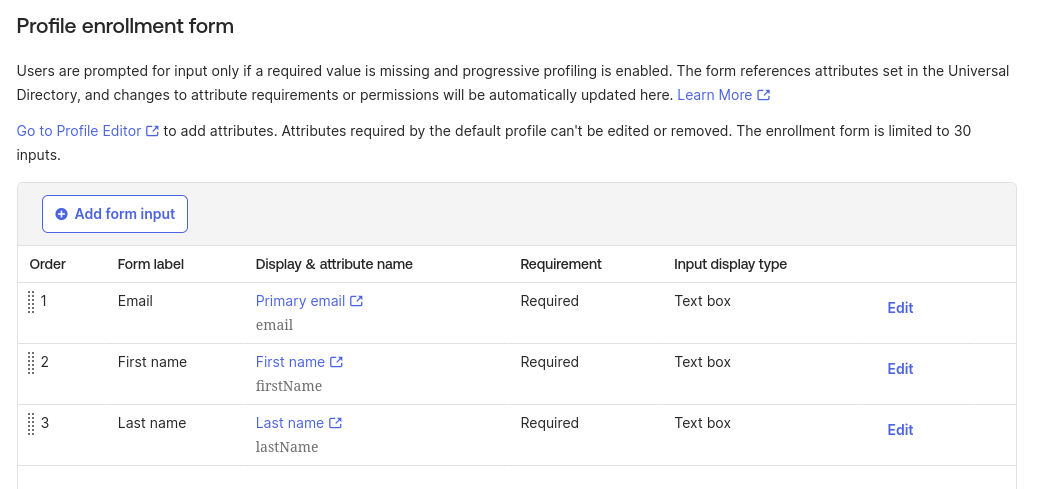
The sign up form inputs are configured in Security > Profile Enrollment by selecting the policy used for the application.
Allowing Sign Up with other Identity Providers
In Security > Identity Providers, you can add a number of identity providers, including Microsoft IdP, Google IdP, and others. They can be assigned to certain applications through the Routing rules tab.
User Management
User management can be done by using both fetch and delete methods through the API. To use the API, you need to generate an API token.
- In Security > API, navigate to the Token tab to generate a new token.
Fetching Users
Fetching all users assigned to the created application can be done via the /api/v1/apps/:appId/users endpoint.
GET /api/v1/apps/:appId/users
Path parameter:
appId- The ID of the application.
- Required
Query parameter:
expand=user- Find user accounts that did not fit the criteria for the sign up, but were still created and are inactive.
- Optional
Example
An example of a request to fetch all user IDs, their usernames, and statuses of the users assigned to the application.
curl "https://${OKTA_INSTANCE_URL}/api/v1/apps/${APP_ID}/users?expand=user" \
--header 'Authorization: SSWS ${TOKEN_VALUE}' \
--header 'Accept: application/json' | jq '.[] | [.id, .credentials.userName, ._embedded.user.status]'
Once the results are fetched, the STAGED status indicates that the user account was created, but the user has not yet activated it because they did not match the criteria for the sign up. You can take the IDs of these users and delete them.
Deleting Users
Deleting users assigned to the created application can be done via the /api/v1/users/:userId endpoint.
DELETE /api/v1/users/:userId
Path parameter:
userId- The ID of the user to be deleted.
- Required
Query parameter:
sendEmail- If set to
true, an email will be sent to the user notifying them of the deletion. - Optional
- If set to
Example
An example of a request to delete a user with the STAGED status.
curl -X DELETE "https://${OKTA_INSTANCE_URL}/api/v1/users/${USER_ID}?sendEmail=false" \
--header 'Authorization: SSWS ${TOKEN_VALUE}' \
--header 'Accept: application/json'
You will need to execute the request twice because the first request deprovisions the account, while the second request deletes it.