Kiteworks Integration — ICAP Connector Setup
Spectra Detect integration with Kiteworks
Kiteworks users can integrate Kiteworks with Spectra Detect over ICAP.
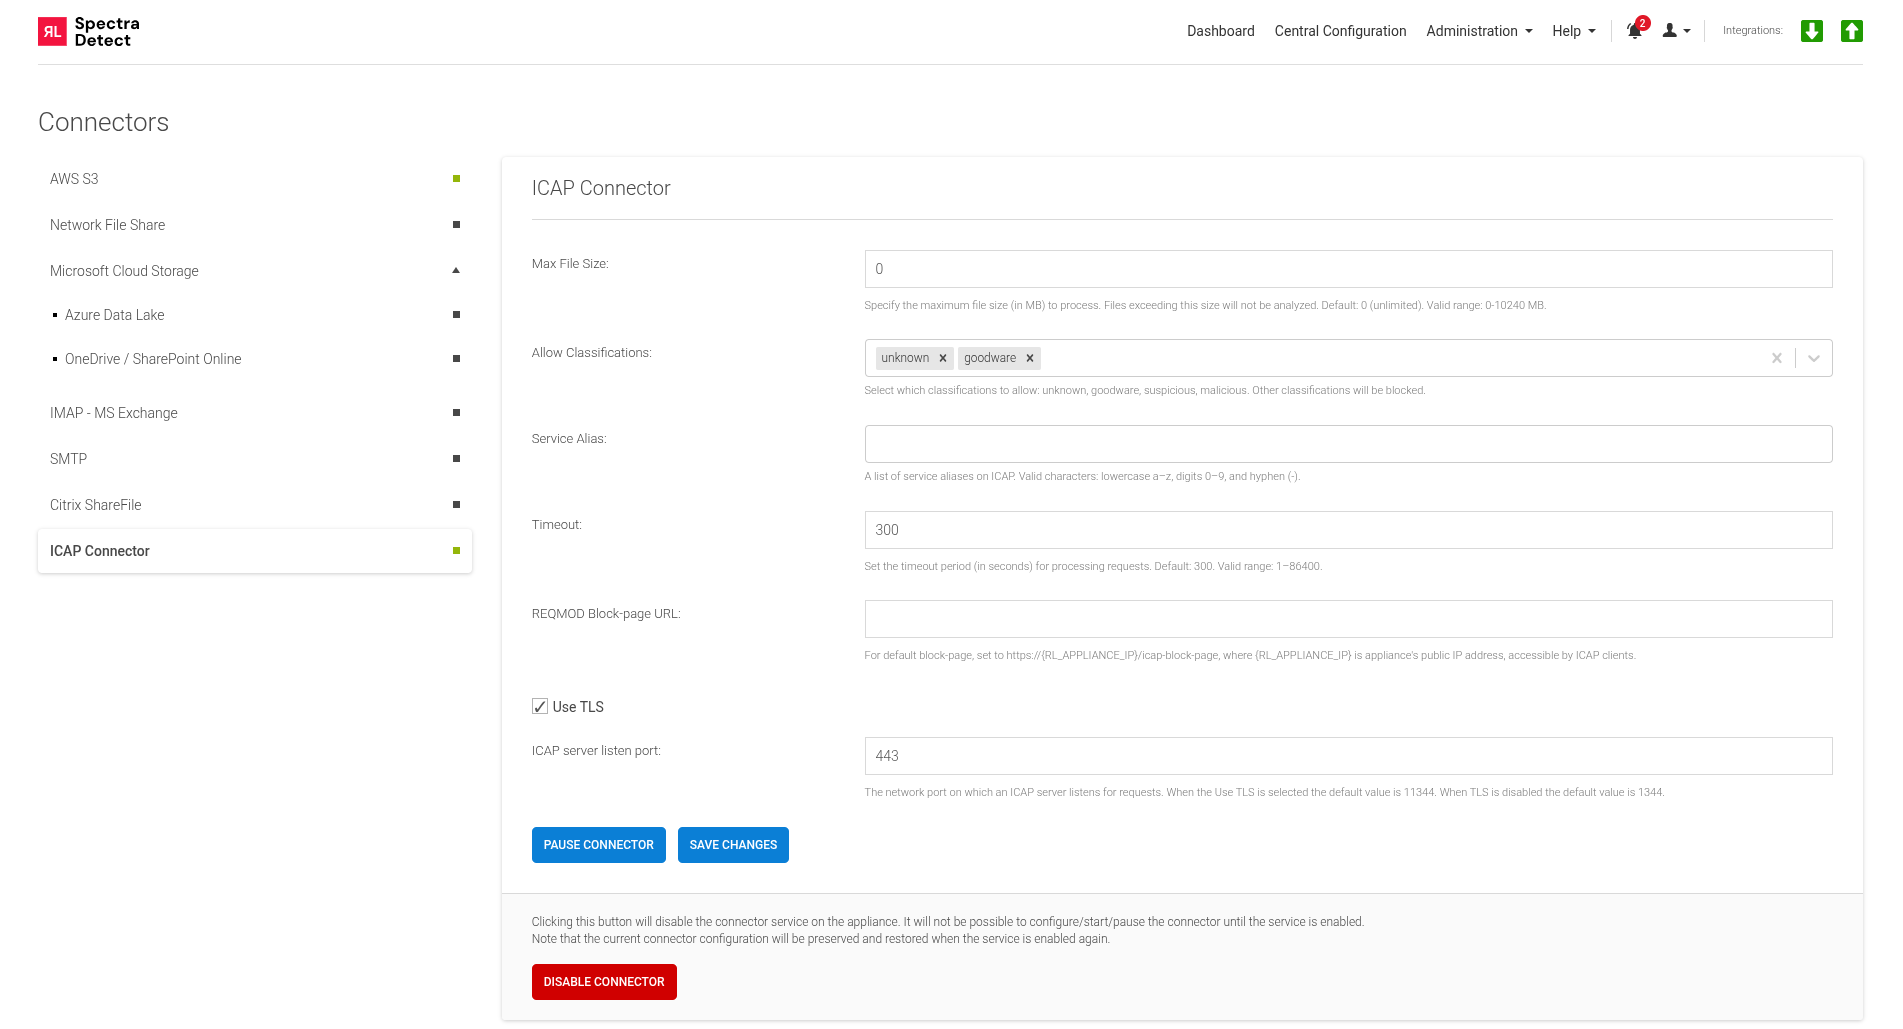
- Enable ICAP connector on Spectra Detect Manager.
- On Kiteworks, navigate to Admin console > Security policies > Files and folders > Security scanning tab, and select Add to add the new integration.
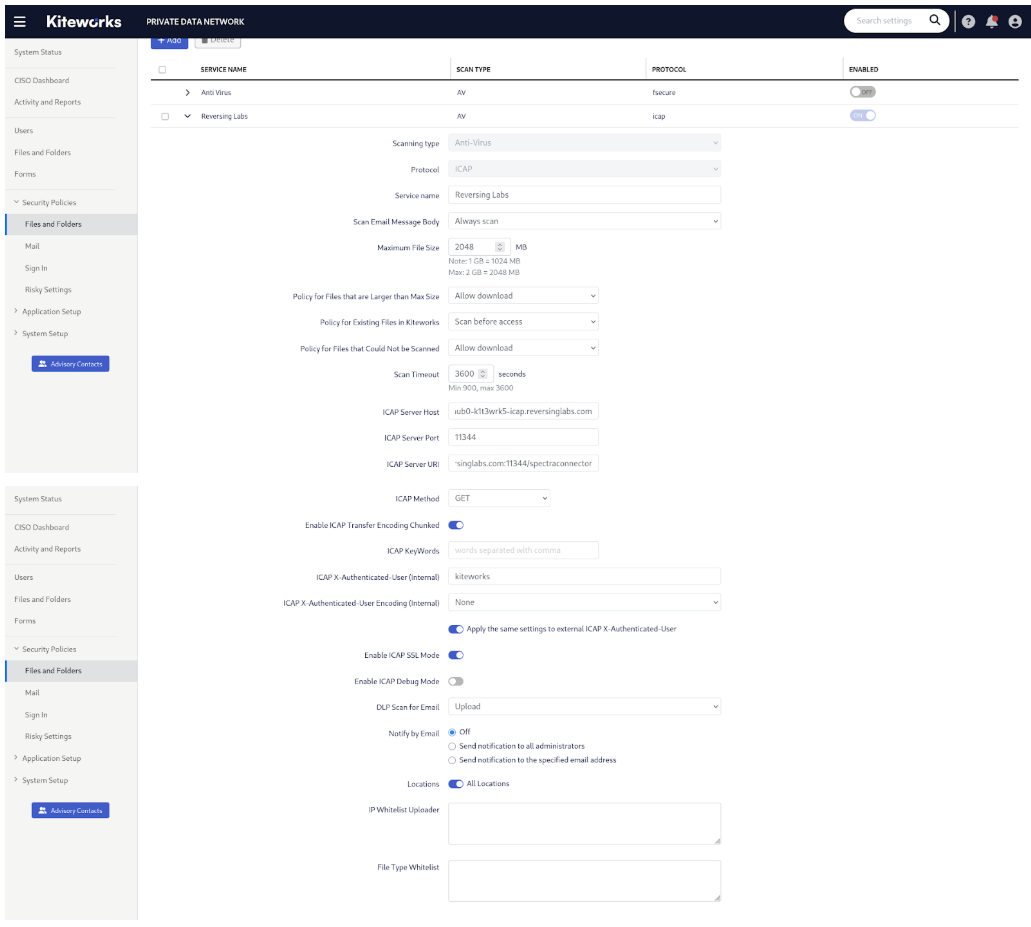
- Enter the required values as described below:
-
Scanning type- Must be set to
Anti-Virus.
- Must be set to
-
Protocol- Must be set to
ICAP.
- Must be set to
-
Service name- Can be set to any value. The value will be displayed as the "service name" in the Kiteworks UI column. For example, it can be set to
ReversingLabs.
- Can be set to any value. The value will be displayed as the "service name" in the Kiteworks UI column. For example, it can be set to
-
Scan Email message body- Depends on user requirements. Users can leave the default value:
Always scan.
- Depends on user requirements. Users can leave the default value:
-
Maximum file size- Should be the same or lower than the specified value in the ICAP connector configuration. By default, the value in ICAP configuration is
0(unlimited), so any value on Kiteworks should work.
- Should be the same or lower than the specified value in the ICAP connector configuration. By default, the value in ICAP configuration is
-
Policy for Files that are Larger than Max Size- Depends on user requirements. Set the value to either
Allow downloadorQuarantine.
- Depends on user requirements. Set the value to either
-
Policy for Existing Files in Kiteworks- Depends on user requirements. Set the value to either
Allow accessorScan before access.
- Depends on user requirements. Set the value to either
-
Policy for Files that Could Not be Scanned- Depends on user requirements. Set the value to either
Allow downloadorQuarantine.
- Depends on user requirements. Set the value to either
-
Scan timeout- Valid range on ICAP connector is from
1to86400seconds. Default value is300seconds. Value on Kiteworks should be the same or lower than the specified value in the ICAP connector configuration.
- Valid range on ICAP connector is from
-
ICAP Server Host- Must be the value of Spectra Detect Hub that hosts the ICAP connector.
-
ICAP Server Port- Must be the same port value that’s configured on the ICAP connector. Default value is
11344for communication using secure ICAP.
- Must be the same port value that’s configured on the ICAP connector. Default value is
-
ICAP Server URI- Use the URL format:
icap://{icap_hub_hostname}:{icap_port}/spectraconnector. Whileicaps://cannot be entered here, secure transport is configured later in the setup process. The service namespectraconnectoris not an alias; it is the base service name and cannot be changed. Additional aliases such asavscanare available by default. You can also configure custom aliases, for example:my-new-alias-for-spectraconnector. From the ICAP client perspective, the base service name and all aliases share the same behavior.
- Use the URL format:
-
ICAP Method- Must be set to
GET.
- Must be set to
-
Enable ICAP Transfer Encoding Chunked- Must be enabled.
-
ICAP KeyWords- Can be left blank.
-
ICAP X-Authenticated-User (Internal)- Can be set to any value, for example
kiteworks. ICAP connector doesn’t take this header into account when processing files.
- Can be set to any value, for example
-
ICAP X-Authenticated-User Encoding (Internal)- Can be set to
None(default).
- Can be set to
-
Apply the same settings to external ICAP X-Authenticated-User- Can be enabled (default).
-
Enable ICAP SSL Mode- Must be enabled.
-
Enable ICAP Debug Mode- Should be disabled.
-
DLP Scan for Email- Can be set to the default value.
-
Notify by Email- Can be whatever the user requires. This is the email address that will receive notifications about the scanning results.
-
Locations- Should be enabled.
-
IP Whitelist Uploader- Enter the list of whitelisted IP addresses from which the requests are not scanned.
-
File Type Whitelist- Enter the list of whitelisted file types which will not be scanned.
Once the configuration is complete, the integration will be ready to use. Below is an example of the configuration: