Managed Identity Setup
Overview
This page explains how to set up managed identity on your Azure VM and use it for obtaining authorization tokens without the need for a client ID and a client secret.
Prerequisites
Before you begin, ensure you have the following:
- Access to the Azure portal with appropriate permissions to manage VMs and assign roles.
- A virtual machine (VM) running in Azure.
- Spectra Detect or Spectra Analyze application deployed in Azure on the same tenant you wish to use the connector with.
Enable Managed Identity on Your VM
- Sign in to the Azure portal.
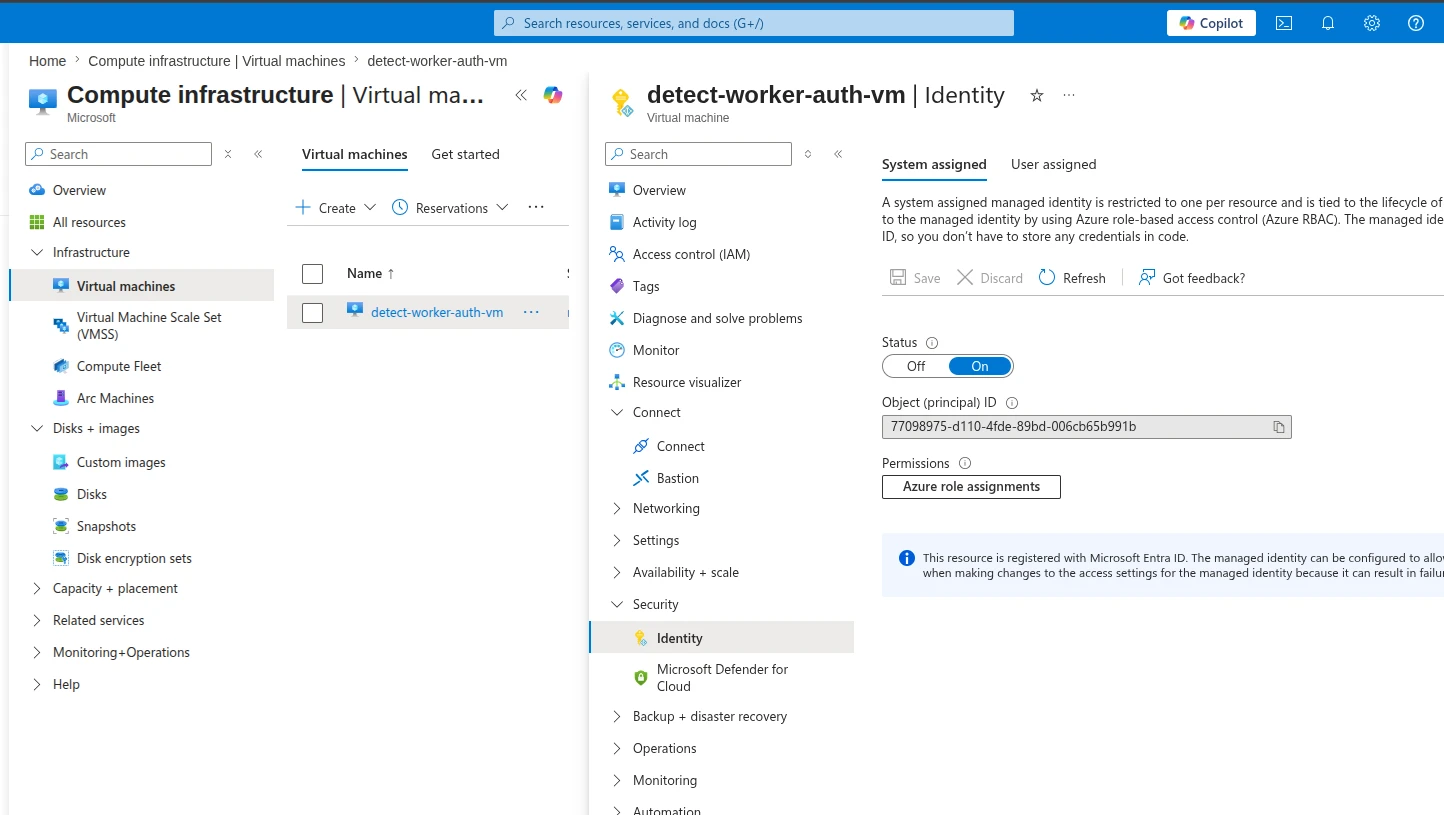
- Navigate to your Virtual Machine.
- In the left-hand menu, select Security > Identity.
- Under System assigned, select On. This starts the managed identity setup process. Azure typically needs a few minutes to deploy all the required resources on your VM, so wait for it to finish before continuing.
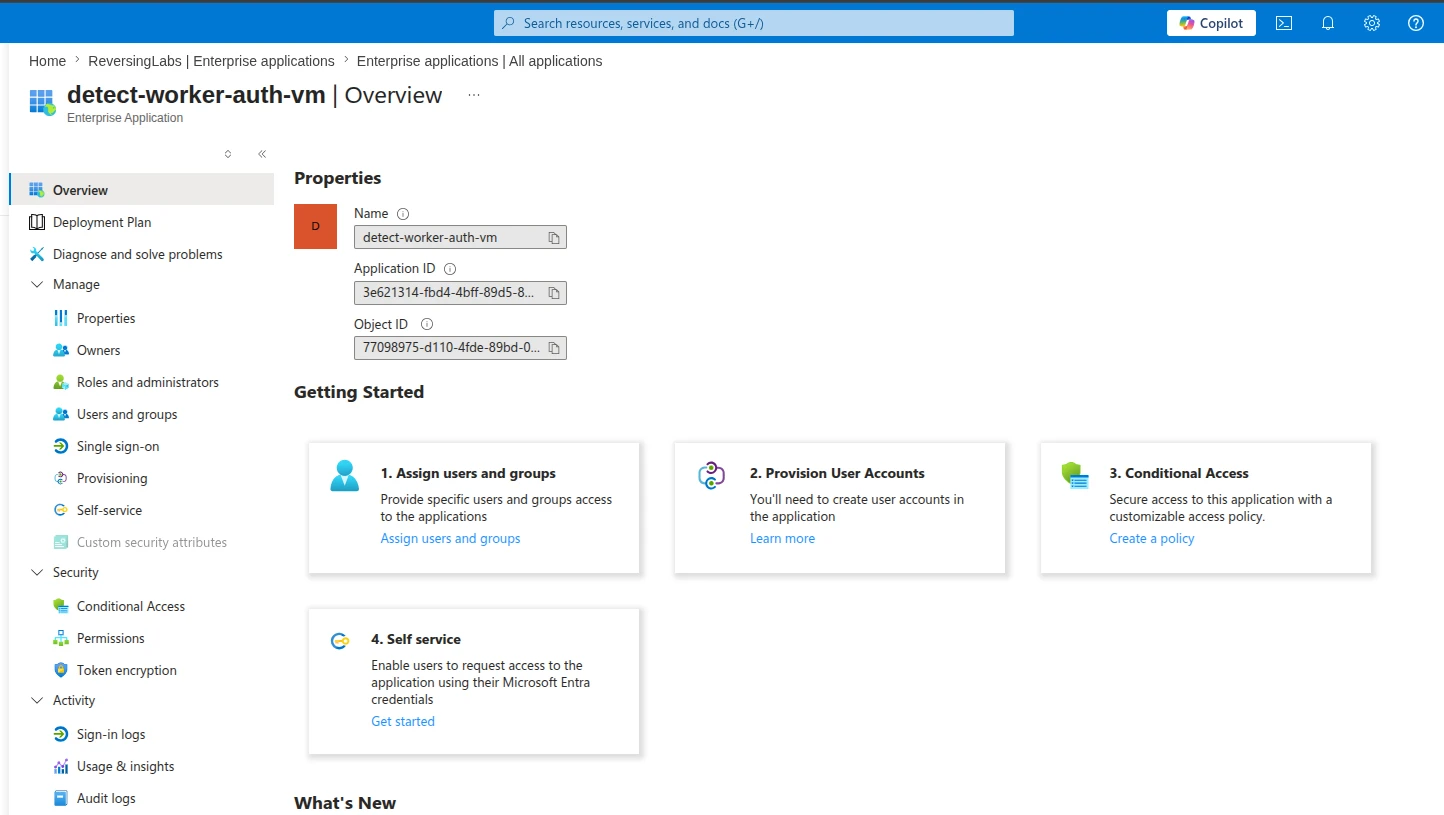
- Go to Entra ID > Enterprise applications.
- Remove search filters and search for your VM’s name. This shows the created application with the same name as your VM.
Setting Up the Required Permissions
A command-line interface (CLI) is required for the following steps. Open a Cloud Shell in the Azure portal to get started. All examples use Bash.
Get the Managed Identity Principal ID
Run the following in Cloud Shell:
az vm identity show \
--resource-group <RESOURCE_GROUP> \
--name <VM_NAME>
The resource group and the VM name can be found in the Overview section of your VM.
This returns a JSON response similar to the following:
{
  "principalId": "3c518427-a90f-42de-b6c1-7f0ad2e84b35",
  "tenantId": "7d214806-9c73-4af1-b250-61e9c7d5a2f4",
  "type": "SystemAssigned"
}
Save the principalId for later. It will also be used as the MANAGED_IDENTITY_OBJECT_ID.
Get Microsoft Graph Service Principal ID
Run the following in Cloud Shell:
az ad sp list --display-name "Microsoft Graph" --query "[0].id"
Save the returned string. This is the GRAPH_SERVICE_PRINCIPAL_OBJECT_ID, which is used as the resourceId in a later step.
Find Graph App Role IDs
Enterprise applications do not support adding API permissions through the Entra UI, so use a CLI request instead. The required permissions are the same as those used for the app registration:
-
Files.ReadWrite.All
-
Sites.ReadWrite.All
-
User.Read.All
Run the following command for each permission to retrieve its ID:
az ad sp show \
  --id <GRAPH_SERVICE_PRINCIPAL_OBJECT_ID> \
  --query "appRoles[?value=='Files.ReadWrite.All']"
This example retrieves the ID for the Files.ReadWrite.All permission. Repeat the command for the remaining two permissions and store each id value. These are used as the GRAPH_APP_ROLE_ID in a later step.
Assign Graph Permissions (Roles) to the Managed Identity
Run the following command for each permission:
az rest --method POST \
  --uri "https://graph.microsoft.com/v1.0/servicePrincipals/<MANAGED_IDENTITY_OBJECT_ID>/appRoleAssignments" \
  --body '{
    "principalId": "<MANAGED_IDENTITY_OBJECT_ID>",
    "resourceId": "<GRAPH_SERVICE_PRINCIPAL_OBJECT_ID>",
    "appRoleId": "<GRAPH_APP_ROLE_ID>"
  }'
Using the variables you stored in the previous steps, assign the required permissions (roles), and proceed to test them.
Verify Permissions
Connect to your VM using SSH, then run the following command:
curl -H "Metadata: true" \
"http://169.254.169.254/metadata/identity/oauth2/token?api-version=2018-02-01&resource=https://graph.microsoft.com"
Store the returned access token and use it when running the following command:
curl -H "Authorization: Bearer <TOKEN>" \
https://graph.microsoft.com/v1.0/users
If the permissions are correctly assigned, the token returns the user list from your Azure tenant. The connector can now fetch tokens using the managed identity, without a client ID or client secret.