Individual Installation and Setup — Browser Extension
Best practices
Before proceeding with the installation and configuration of the ReversingLabs browser extension, read through the following recommendations to ensure the browser extension maintains security and compliance.
Internal document privacy
Review ReversingLabs Privacy documentation to ensure the Account Role configured for the browser extension’s download scanning function conforms to your enterprise’s privacy policy.
As a best practice, it is recommended that all files scanned by the browser extension leverage a Private Account Role. Files uploaded using a Public Account Role are available to other ReversingLabs customers. If you are unsure which Account Role has been set up for you, contact support@reversinglabs.com.
For organizations whose main use case is ensuring files from external sources are scanned, an additional best practice is to add your organization's internal sites, such as SharePoint, document repositories, and other internal systems, to the list of excluded domains. For more information, see Context menu > Add to Allow List. This ensures that users can access the domains, but the extension does not scan files downloaded from those trusted, private locations.
Installation
Download a supported browser. Then go to the ReversingLabs Browser Extension in the Chrome web store and install it.
Configuration
After installing the extension from the web store, a new tab opens displaying the configuration options.
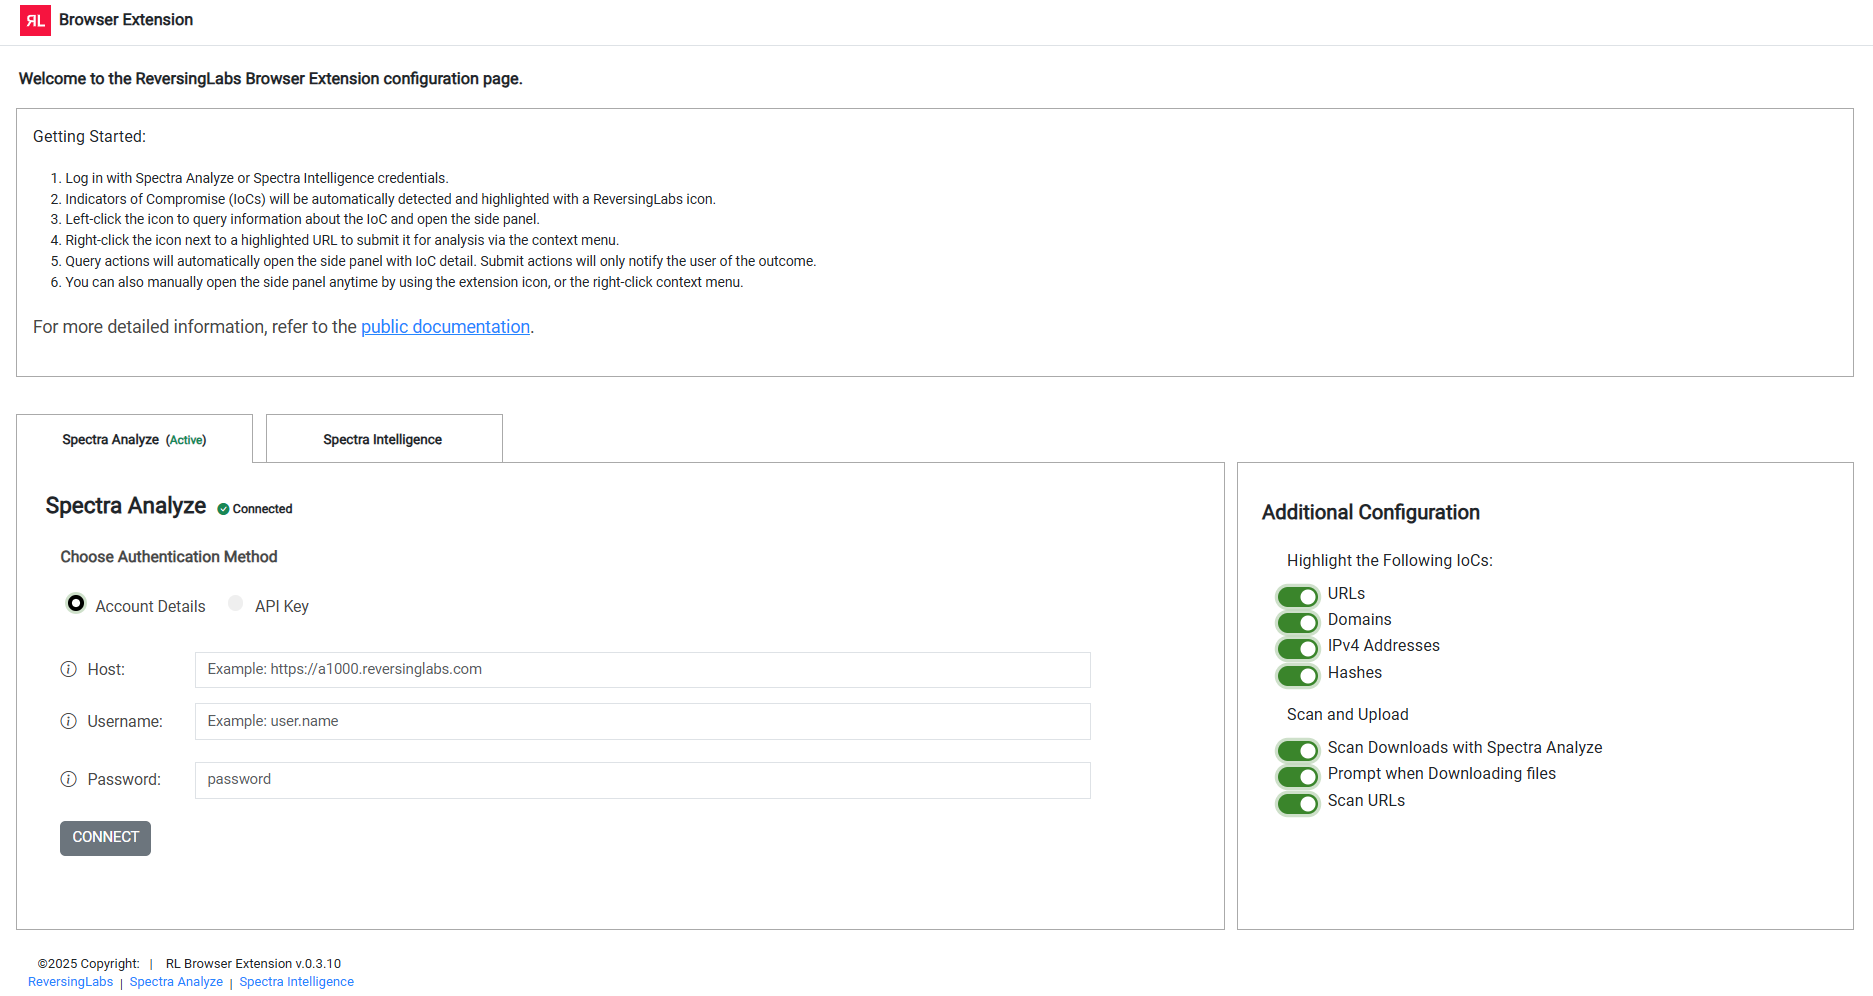
In the Spectra Analyze/Spectra Intelligence tabs, enter your credentials for either Spectra Analyze or Spectra Intelligence, and confirm by clicking Connect.
At this time, users may select only Spectra Intelligence OR Spectra Analyze, not both.
In the Additional Configuration tab, switch options on or off according to your needs. For more information about each of the options, see Configuration options.
Configuration options
You can customize how the extension identifies and interacts with Indicators of Compromise (IOCs), file downloads and URL reputation checks.
The following features are available:
- Indicator highlighting: URLs, Domains, IPv4 addresses, and Hashes are automatically identified on web pages and indicated with a RL icon.
- Scan downloads: downloaded files are automatically scanned using Spectra Analyze or Spectra Intelligence.
- Prompt when downloading files: the extension asks for confirmation before a file is submitted for analysis which provides more control over uploads for analysis.
- Scan URLs: the extension checks URLs before opening them. If a URL is flagged as suspicious or malicious, the browser redirects you to a warning page before proceeding.
All options are enabled by default.
Configuring allowed and blocked domains
You can also configure lists of allowed and blocked domains. Allowed domains are domains where all browser extension functionality has been disabled. Blocked domains are domains for which the browser extension blocks all download and connection attempts.
- Find a highlighted domain on the page and do either of the following:
- Right-click the RL icon.
- Select the underlined text, and then right-click it.
- Hover over the ReversingLabs Browser Extension item.
- Click the appropriate action:
- Add to Allow List: disable all scanning and analysis for a specific website. Use this option only for internal and trusted sites that you want to visit, and from which you want to download content without disruptions.
- Add to Block List: completely block downloads and page visits from a specific website. Use this option for high-risk and untrusted sites.
Error report buttons
The extension uses mailto: links to allow users to report any issues encountered while using the extension. To use this feature, users must have a default email app set up.
Windows email app setup
- Click Start and go to Settings > Apps > Default apps.
- On the Default apps page, do one of the following:
- Windows 10
- Go to Email.
- Select the current app listed.
- Under Choose an app, select your desired client.
- Windows 11
- Go to Set defaults for applications.
- Scroll to find your desired client, then select it.
- Set the default mail client for a specific file type:
- Select an item.
- Select your desired client.
- Select Set default to confirm.
- Windows 10
Linux email app setup
How mailto:// is handled depends on the distribution and desktop environment. Check your distribution's documentation on how to set up the URL handler.
macOS email app setup
- Open the Apple Mail app.
- From the menu bar, click Mail and select Preferences.
- Go to General > Default email reader, and select an email app from the dropdown menu.
- If you use webmail, select your preferred browser from the dropdown menu.
- Check if your preferred browser has any additional settings which need to be altered.
Troubleshooting
Spectra Analyze self-signed certificates
Issues with the TLS certificate setup present as network connection issues in the extension. This affects the following Spectra Analyze instances:
- Self-hosted instances
- Instances deployed with self-signed certificates
By default, the extension requires that any host configured with the https:// protocol provides a valid and trusted certificate.
To resolve this issue, make sure that the certificate from your Spectra Analyze instance is trusted by your OS and by your browser.
Before proceeding, confirm the authenticity of the certificate which will be added to the trust store.
If the certificate’s Common Name does not match the Spectra Analyze instance DNS, the error persists even for trusted certificates.
Follow one of these steps to add the certificate to your trust store:
- Add the certificate to the OS trust store.
- Follow your operating system vendor’s instructions for adding trusted certificates.
- Clear the browser cache and restart the browser.
- Open
chrome://certificate-manager/localcerts/platformcertsand confirm that the browser has detected the added certificate.
- Add the certificate to Chrome’s imported certificates.
- Open
chrome://certificate-manager/localcerts/usercertsin your browser. - Use the
Importbutton to add the certificate.
- Open
After these steps are completed, the connection can be configured.